


Building Secure AI Systems with Model Context Protocol (MCP): A Comprehensive Guide
Learn how Model Context Protocol (MCP) enhances AI security by enabling integration between LLMs and security tools. This guide covers MCP fundamentals, building custom MCP servers with TypeScript, testing with the inspector tool, and integrating with Claude. Leverage Cyprox's open-source ecosystem to transform standard AI models into powerful security assistants.

Model Context Protocol (MCP): Revolutionizing AI Security Infrastructure
Introduction: Understanding MCP and Its Significance
Model Context Protocol (MCP) is a specialized framework designed to secure and standardize interactions between AI models and their operational environments. In today's AI-driven security landscape, MCP provides essential structure for how models receive data, process information, and communicate within a system.
One of the most powerful capabilities of MCP is its ability to extend Large Language Models with specialized tools and functions. By integrating security tools like URL fuzzing through the Model Context Protocol, organizations can transform their LLMs from passive analytical systems into active security participants. For example, security teams can direct an LLM to execute URL fuzzing operations against a target endpoint, then leverage the model's advanced reasoning to interpret complex vulnerability patterns in the results—identifying potential injection points that might be missed by traditional analysis. Beyond fuzzing, MCP enables similar integrations with network scanning tools, encryption services, and threat intelligence platforms, effectively creating a comprehensive security ecosystem where human analysts and AI work seamlessly together. This functional expansion through MCP represents a paradigm shift in cybersecurity operations, where LLMs serve not just as advisors but as capable, tool-wielding collaborators in the ongoing battle against evolving threats.
The Cyprox MCP ecosystem revolutionizes AI security integration through their GitHub repository. This open-source collection offers plug-and-play MCP servers for popular security tools, eliminating complex setup barriers. Security teams can instantly enhance their LLMs with powerful capabilities like vulnerability scanning and penetration testing—transforming standard AI models into specialized security powerhouses with just a few commands. By democratizing these advanced integrations, Cyprox puts enterprise-grade, AI-enhanced security within reach for organizations of all sizes.
Building MCP Server
Building your own MCP server with TypeScript is surprisingly straightforward. With just a few commands, you can create a custom integration to extend LLM capabilities with your security tools. Here's how to get started:
mkdir mcp-server && cd mcp-server
npm init -y
npm install @modelcontextprotocol/sdk zod
npm install -D @types/node typescript
touch tsconfig.json
mkdir src
touch src/index.ts
Don't forget to configure TypeScript in your package.json file:
{
  "scripts": {
    "build": "tsc"
  },
  ....
}
Next, you'll need to populate your tsconfig.json file with the appropriate configuration:
{
    "compilerOptions": {
        "target": "ES2022",
        "module": "Node16",
        "moduleResolution": "Node16",
        "outDir": "./build",
        "rootDir": "./src",
        "strict": true,
        "esModuleInterop": true,
        "skipLibCheck": true,
        "forceConsistentCasingInFileNames": true
    },
    "include": [
        "src/**/*"
    ],
    "exclude": [
        "node_modules"
    ]
}
After completing these setup steps, you can build your MCP server logic in the index.ts file. The MCP framework leverages Zod for type definitions, making it easy to create robust, type-safe integrations. With just a few type definitions and handler functions, you can create a powerful server that extends your LLM's capabilities with custom security tools.
import { McpServer } from "@modelcontextprotocol/sdk/server/mcp.js";
import { StdioServerTransport } from "@modelcontextprotocol/sdk/server/stdio.js";
import { z } from "zod";
import { spawn } from 'child_process';

// Create server instance
const server = new McpServer({
    name: "mcp-server",
    version: "1.0.0",
});

server.tool(
    "mcp-server", // function name
    "mcp server description", // function description
    {}, // function parameters
    async ({}) => {
        // Handle process completion
        return new Promise((resolve, reject) => {
            if (true){
                resolve({
                    content:[{
                        type:"text",
                        text:"Success",
                    }]
                })
            }else {
                reject(new Error(`Failed to start mcp-server`));
            }
        });
    },
);

// Start the server
async function main() {
    const transport = new StdioServerTransport();
    await server.connect(transport);
}

main().catch((error) => {
    console.error("Fatal error in main():", error);
    process.exit(1);
});
The server.tool function is at the heart of MCP server development, providing the blueprint for integrating tools with LLMs. Here's a breakdown of its four key parameters:
- Function Name: In the example, "mcp-server" - This is the identifier that the LLM will use to call your tool. Choose something descriptive that clearly indicates the tool's purpose.
- Function Description: "mcp server description" - This helps the LLM understand when and how to use your tool. A detailed description improves the model's ability to determine when your tool is appropriate for a given task.
- Function Parameters: The empty object defines what inputs your tool accepts. You would typically use Zod schemas here to define structured, type-safe parameters that the LLM must provide when calling your tool.
- Handler Function: The async function that executes when your tool is called. This contains your tool's core logic, processes the inputs, and returns results back to the LLM in a structured format that includes content types (like text, images, or structured data).
This simple pattern makes it remarkably easy to extend LLM capabilities with custom security tools while maintaining type safety throughout the process.
Once you've completed your implementation, compile your TypeScript code with npm run build. The compiled JavaScript will be available in the build/index.js file, ready for deployment as a fully functional MCP server.
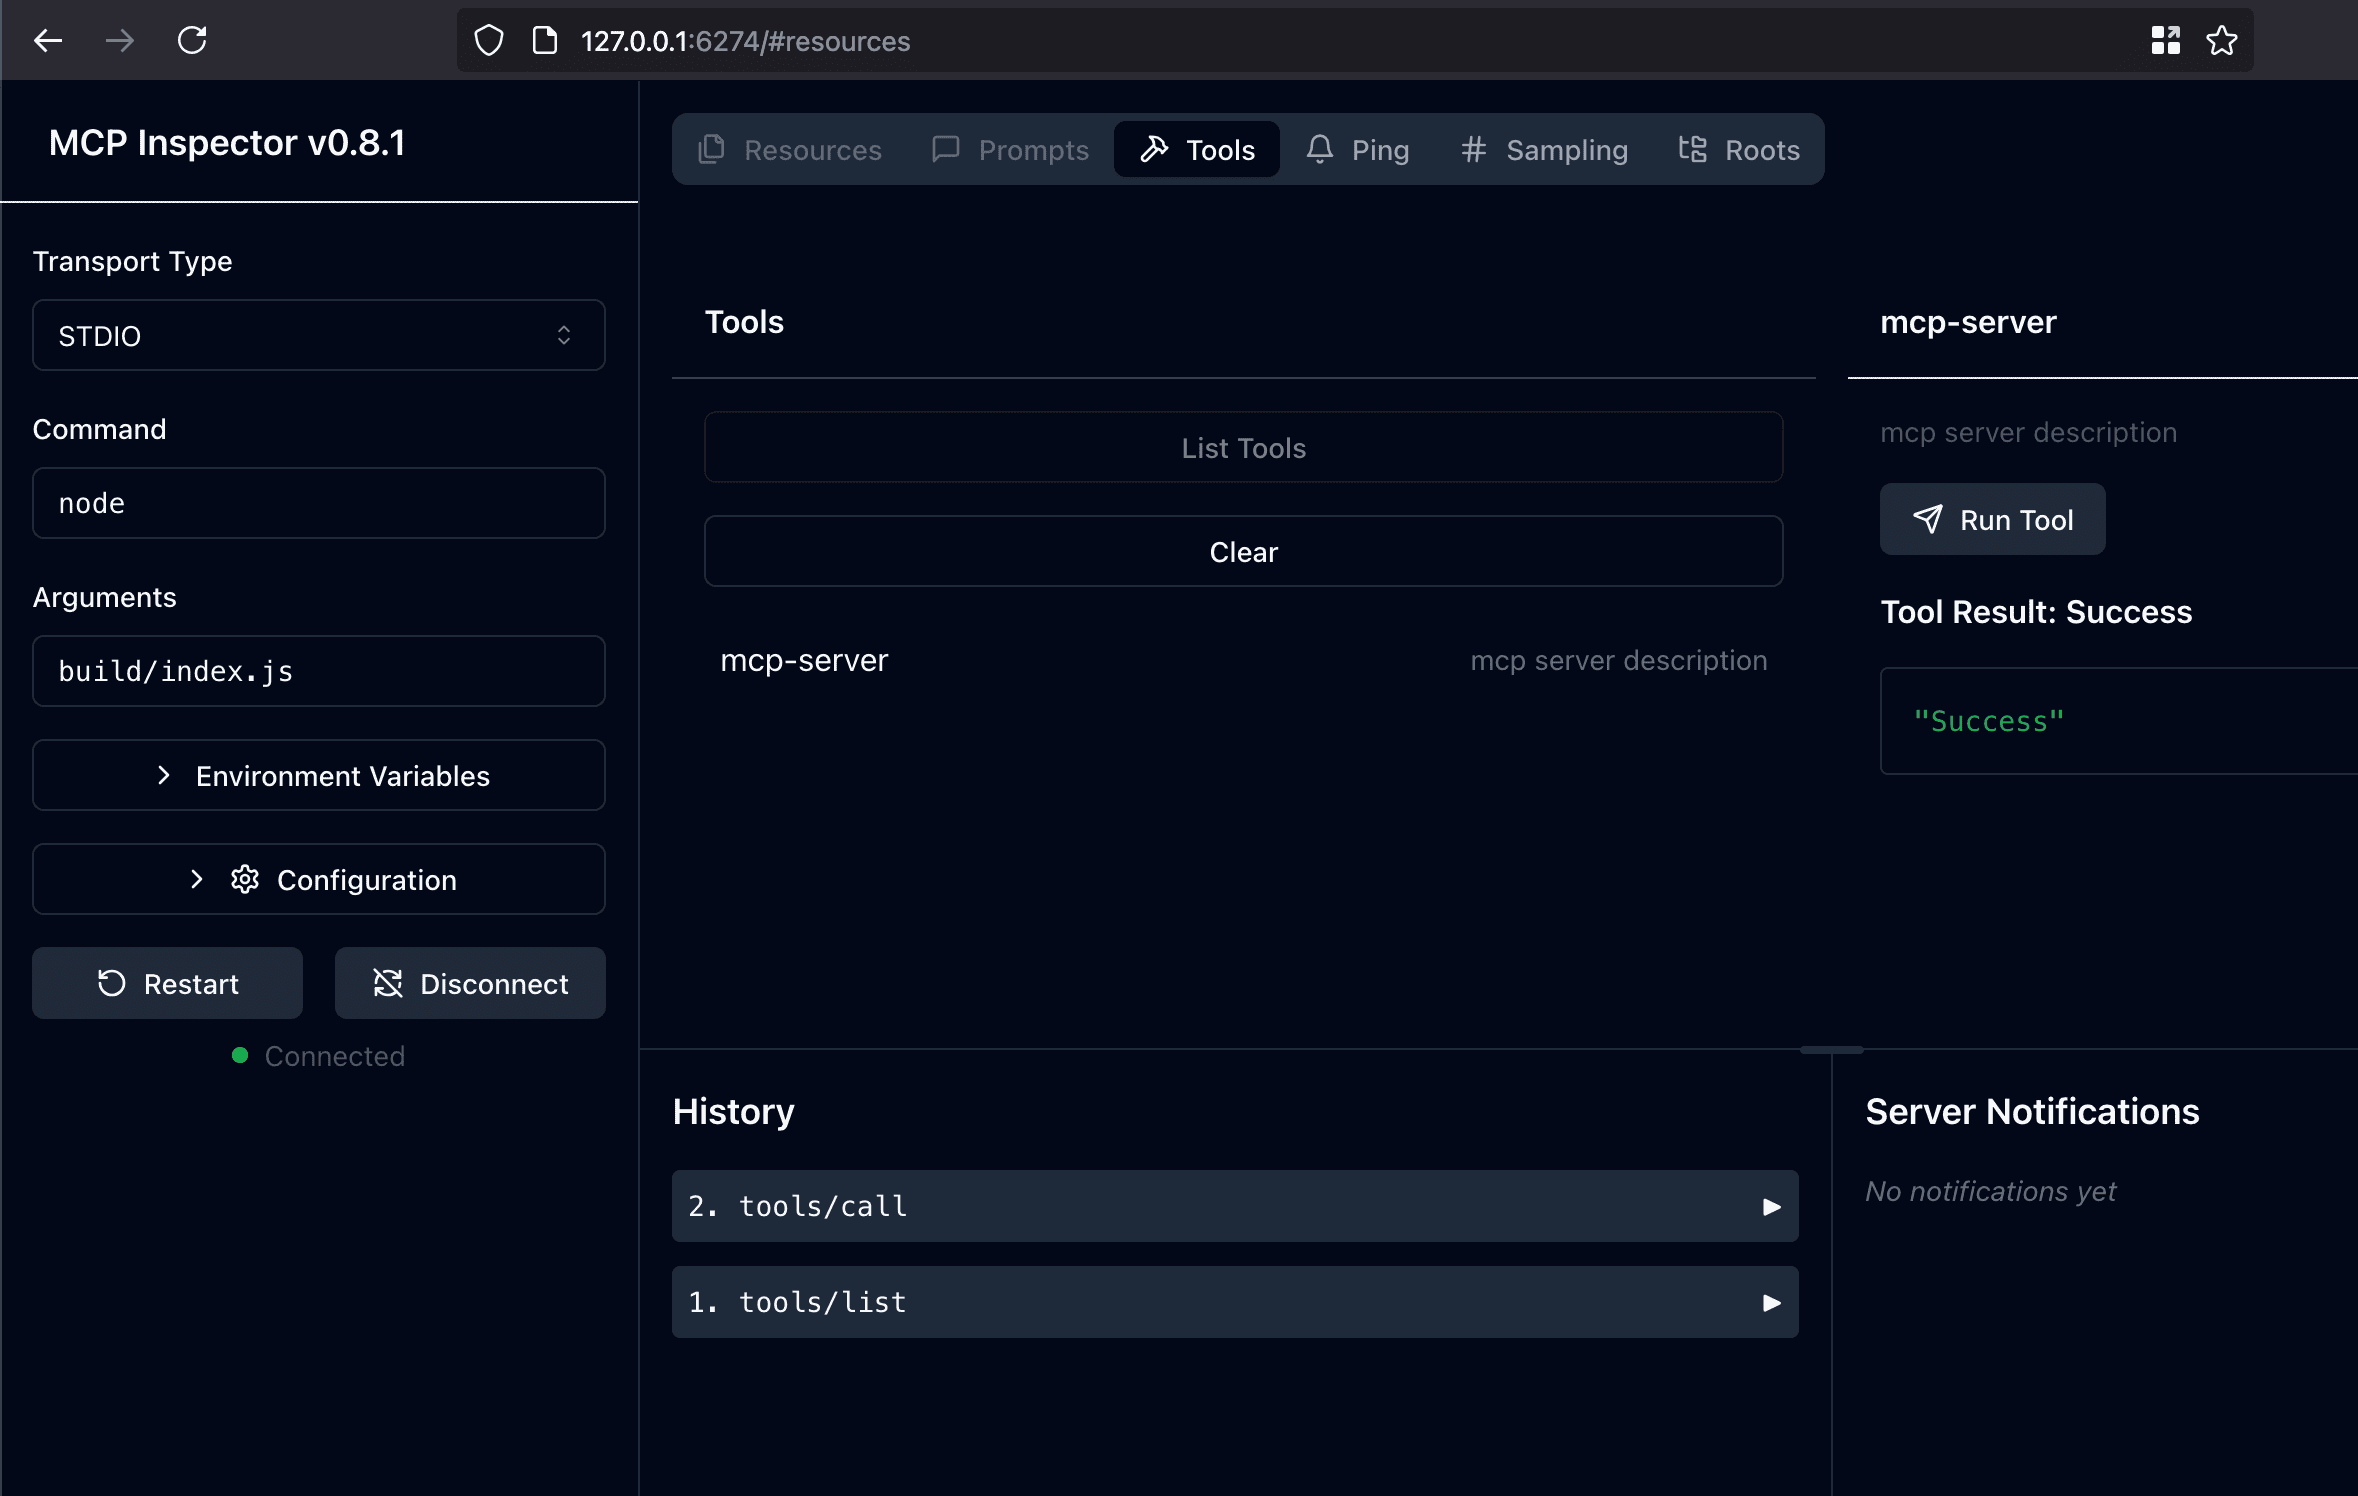
Introspection of MCP Server
Analyzing your MCP server's capabilities and testing its functionality is simple with the @modelcontextprotocol/inspector tool. This utility allows you to examine and interact with your server without connecting it to an MCP client, streamlining the development and debugging process.
npx @modelcontextprotocol/inspector node build/index.js

The intuitive Introspection UI instantly gives you hands-on access to all server functions, allowing you to execute calls and visualize responses in real-time—transforming debugging from a chore into an interactive experience.
Stay at the cutting edge of AI-powered security by following this and other security-focused MCP tools in the Cyprox GitHub repository.
Installation of MCP Server - Claude
Taking your custom MCP server from development to production with Claude is remarkably straightforward. Follow these simple steps to empower Claude with your new security capabilities:
- Open Claude's configuration settings by navigating to:
Claude → Settings → Developer → Edit Config - This will open the
claude_desktop_config.jsonfile where you'll add your MCP server configuration. - Add the following JSON to integrate your server:
{
  "mcpServers": {
    "mcp-server": {
      "command": "node",
      "args": [
        "/path/to/build/index.js"
      ]
    }
  }
}


